
Modified: May 2023
As part of an ongoing effort to increase security and features of the guest wireless network, a new system has been implemented that will impact the traditional ways that staff and student devices are connected. New wireless networks have been created for students, staff, and guests so secure access can be provided for basic Internet connectivity for their mobile devices including laptops, tablets, and mobile phones.
The instructions in this document are for connecting new devices to the network for the first time. Successive connections following the first successful connection will automatically connect to the network without any user intervention.
Contents
Connecting Devices to JSR-Students
Most consumer devices such as laptops and cell phones will be able to determine this sign-on is required and will prompt that additional action is needed to gain access to the network. For these devices, please continue with steps outlined below.
For devices that do not have web browsers or captive portal detection such as gaming consoles, a manual registration is required for the wireless device to gain access to the network. For these devices, please continue with steps outlined on the next page of this document.
Connect a Wireless Device via Credential Login
-
Connect to the JSR-Students wireless network to associate the wireless client. You may select the checkbox to "Connect Automatically" to save this network connection for later use.

-
The device should prompt that additional action is needed to complete authentication to the network. Select this prompt to continue.
-
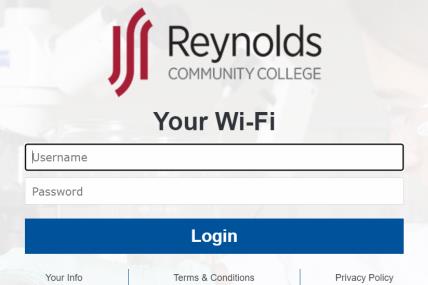
The Reynolds captive portal will display in a webpage prompting for user credentials to continue. Please enter your VCCS EAD (MyReynolds) user credentials and select Login.
- Enter your VCCS EAD (MyReynolds) Username
- Enter your VCCS EAD (MyReynolds) Password
-
Once connected to the wireless, please test:
- Internet access
- VPN (laptops only)
-
If issues occur, please reach out to the Reynolds helpdesk for assistance.
Connect a Wireless Device via Manual Registration
Some devices do not support login via web page. For these devices to be able to connect successfully to the wireless, they will need to be manually registered so the system knows to allow access based on the device's MAC address. You may manually register a total of 5 devices.
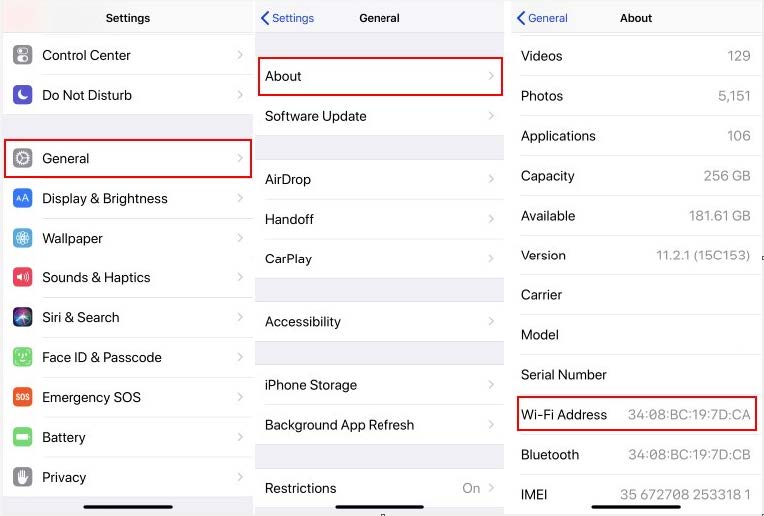
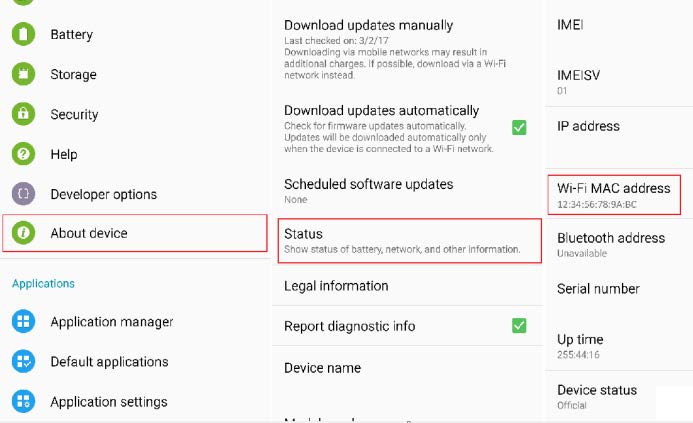
To manually register a device for use on the wireless, another device must be used that already has internet access. The network adapter MAC address must also be collected from the device you wish to register. The MAC address will be 12 characters typically in the form of xx:xx:xx:xx:xx:xx. Some examples of finding the MAC (hardware) address are shown below:
Apple iPhone
Android
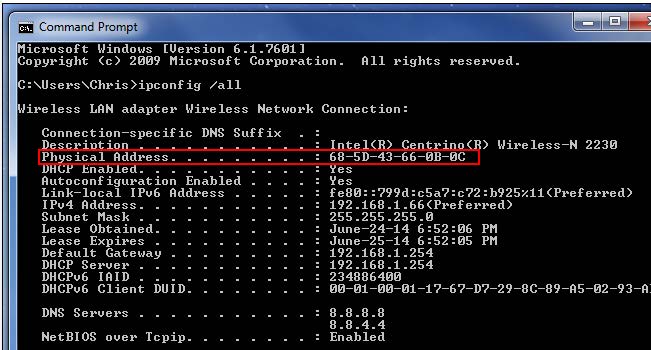
Windows
-
Open a command prompt by pressing Windows key + R, typing "cmd", and pressing Enter.
Device Registration Steps
-
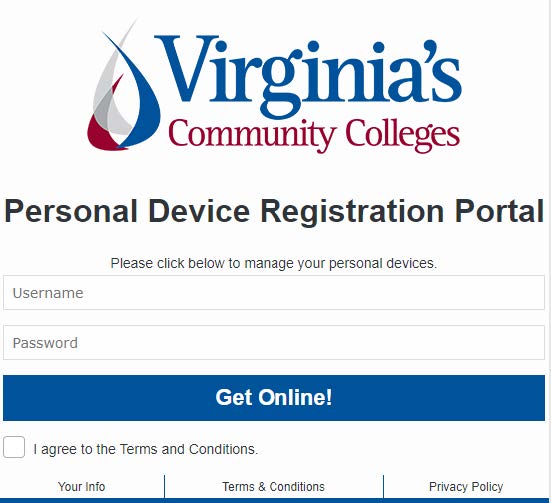
To manually register the device MAC address, or check registration status, navigate to https://vccs.campuswifi.net/device/
-
Please enter your VCCS EAD (MyReynolds) user credentials, check the box to agree with the Terms and Conditions, then select "Get Online".
- Enter your VCCS EAD (MyReynolds) Username
- Enter your VCCS EAD (MyReynolds) Password
You may view your device in the Manage Device section and add/remove entries as desired.
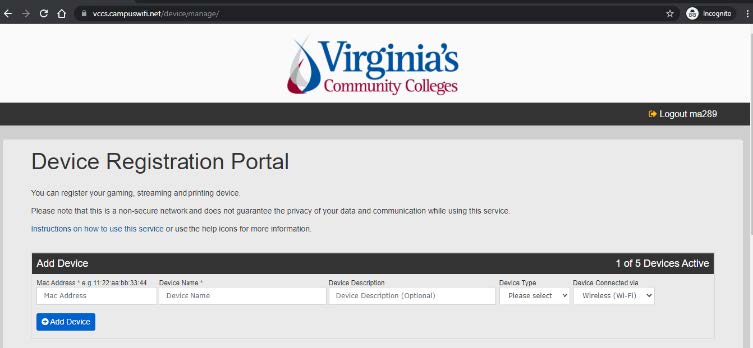
-
Select "Add Device" to register a new device for access. You may register up to 5 devices.
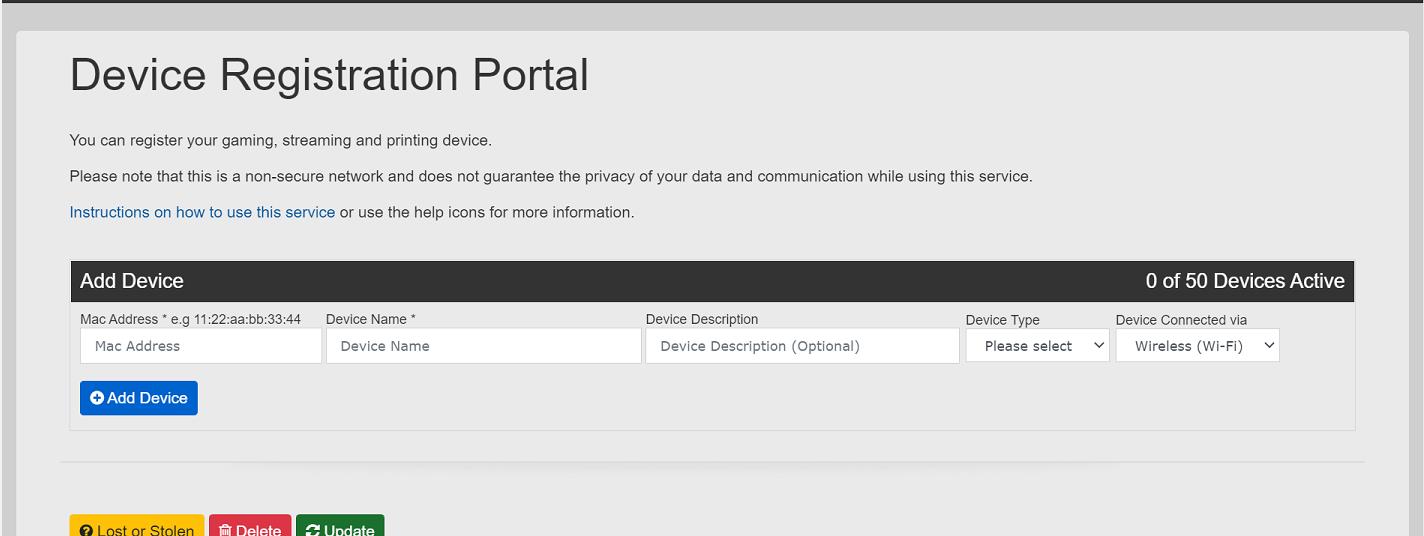
-
Complete the appropriate fields including the MAC address and device name, then select "Add Device" to complete the registration. An example of a completed form is below:

-
The device registration entry will be displayed in the portal.
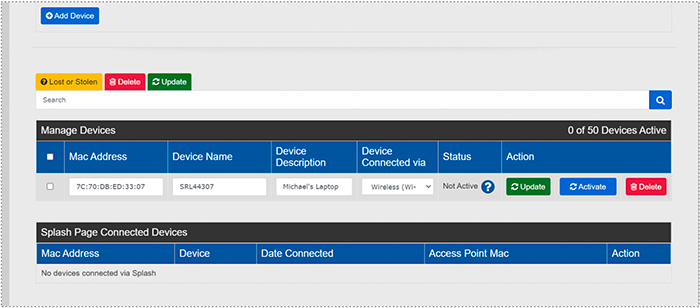
-
To correct values in the device entry, make the change in the applicable field and select Update.
-
To submit the device registration, select Activate.
-
To remove the device from the portal, select Delete.